Everyone loves game maps. Especially when it comes to large game worlds, there’s nothing quite like looking at a mesmerising map filled with awesome detail, and imagine (re)inhabiting parts of this virtual world. When studying a map of a game that I’ve spent dozens if not hundreds of hours in, I often get a sense of both familiarity and strangeness. It’s not just that the map shows a different perspective of the same world I experienced as a game avatar, but that the map misrepresents the player experience world in fundamental ways.
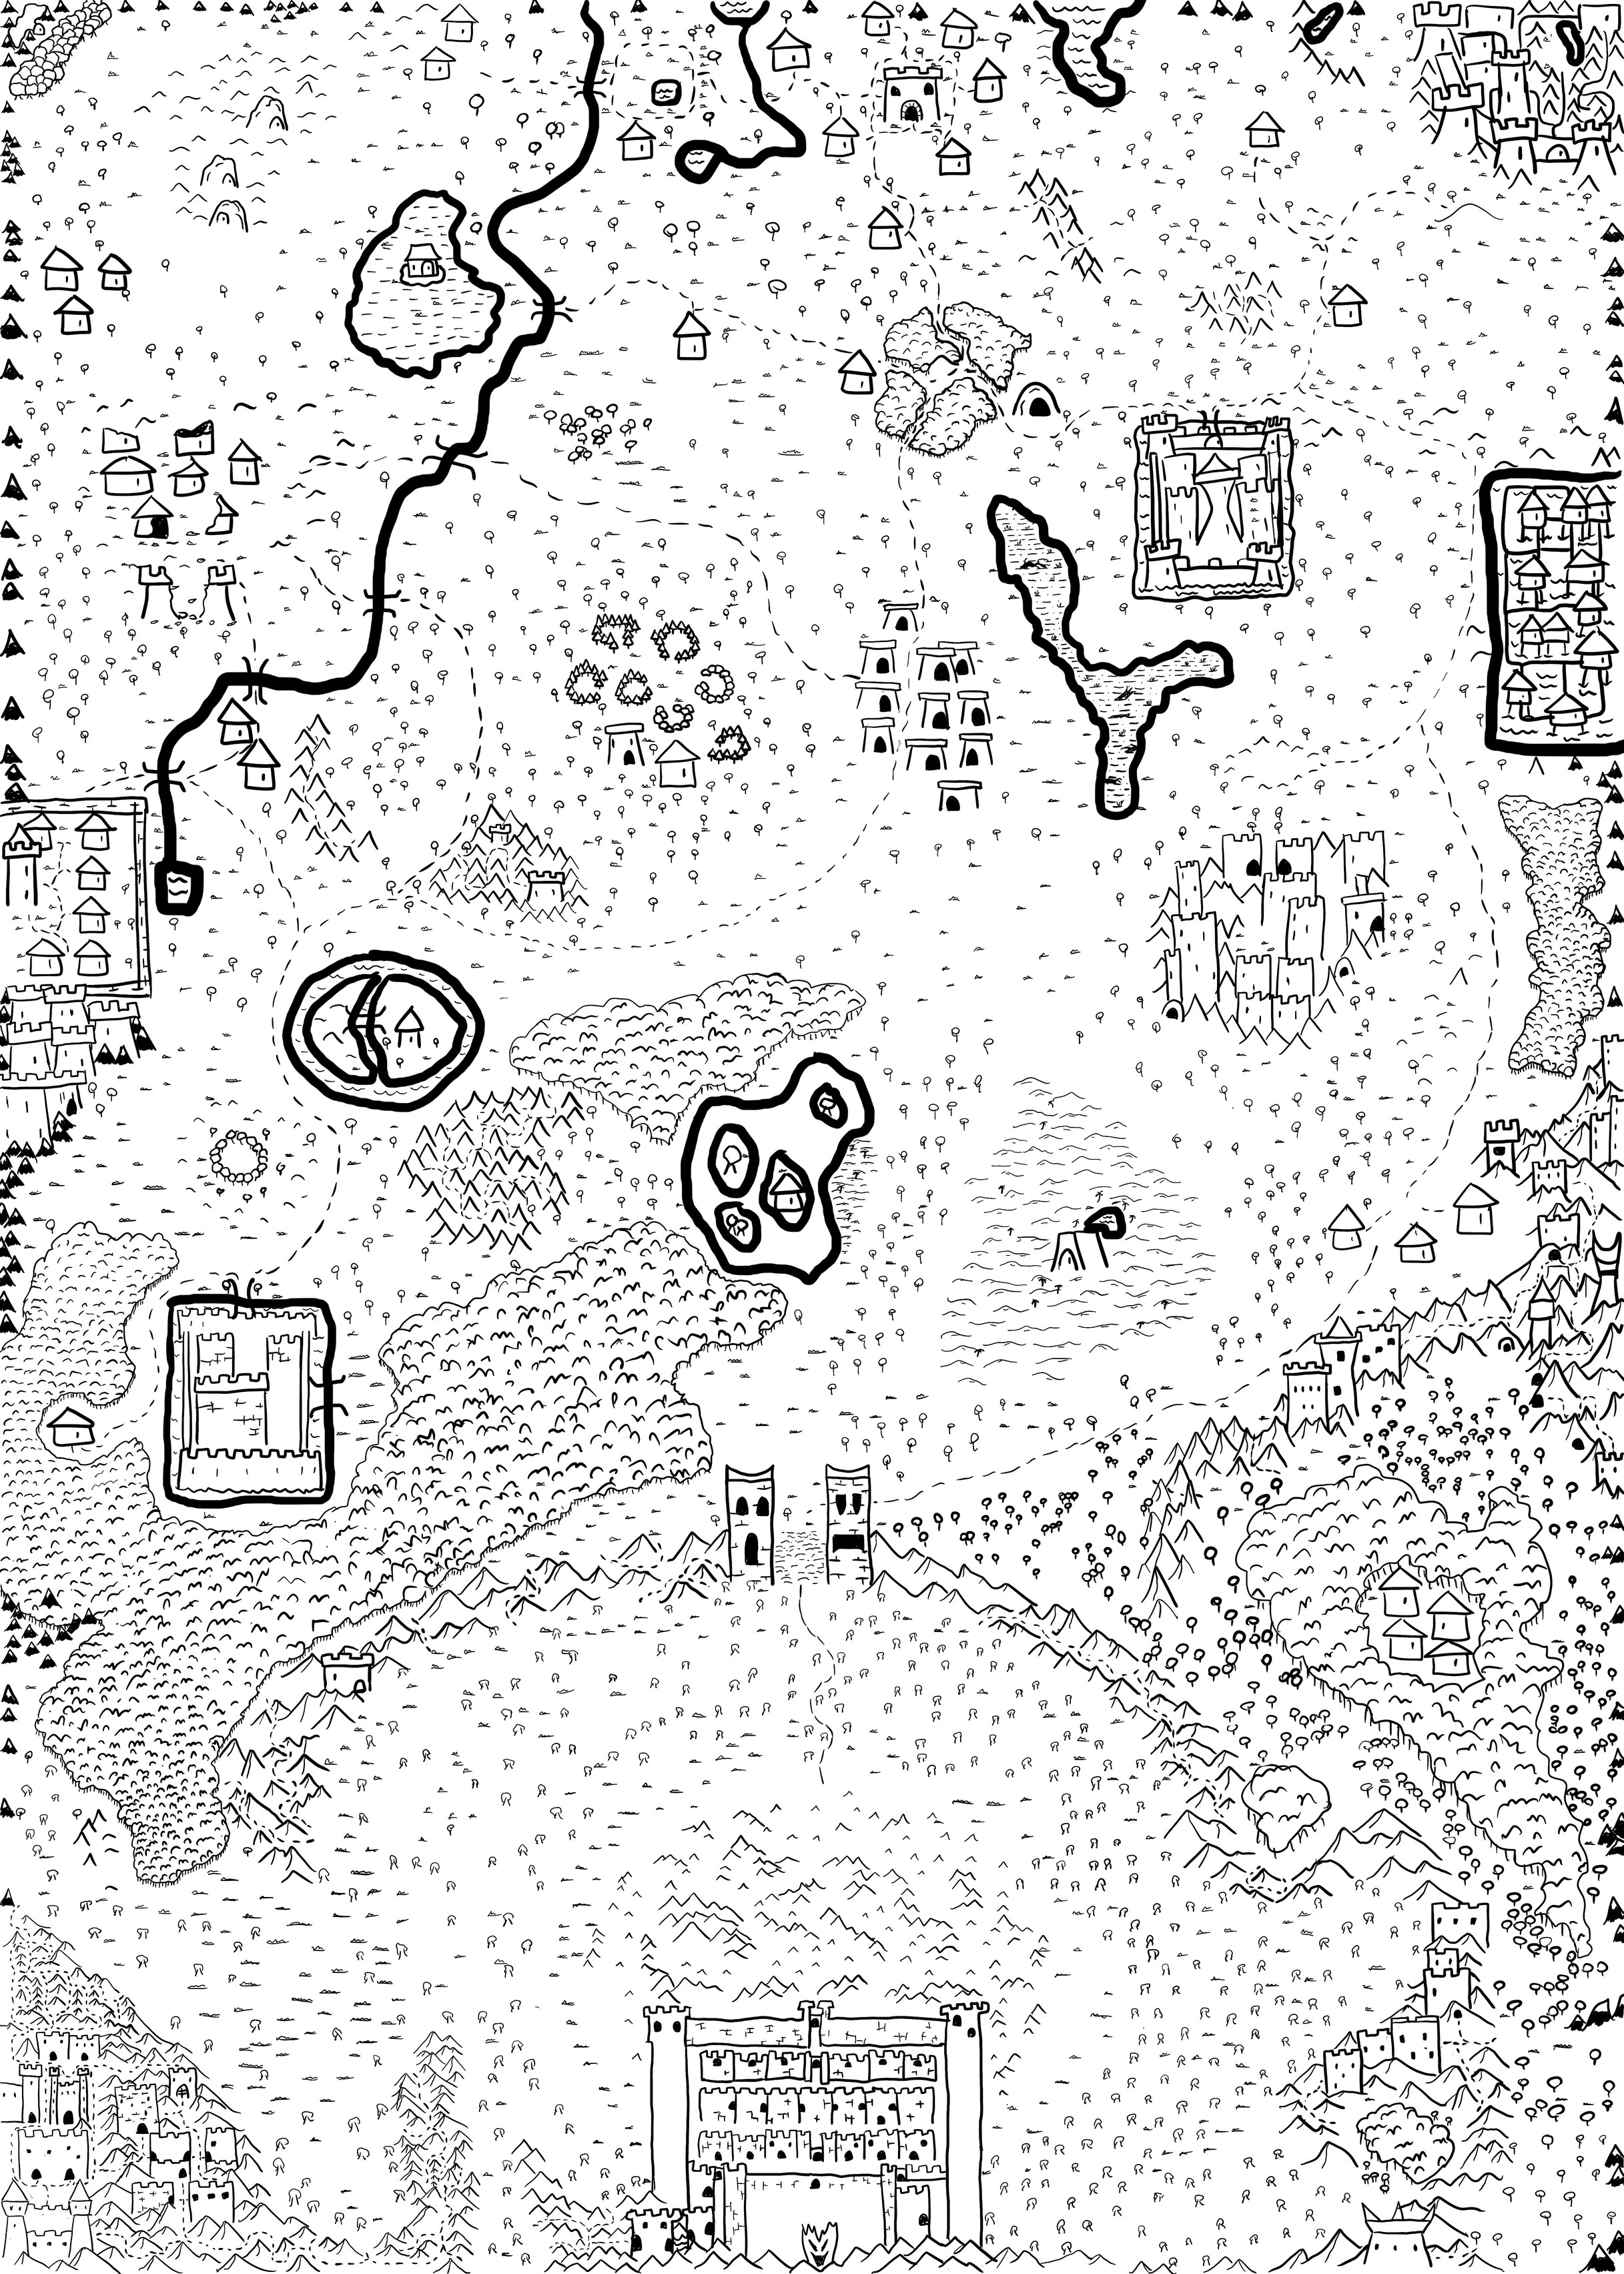
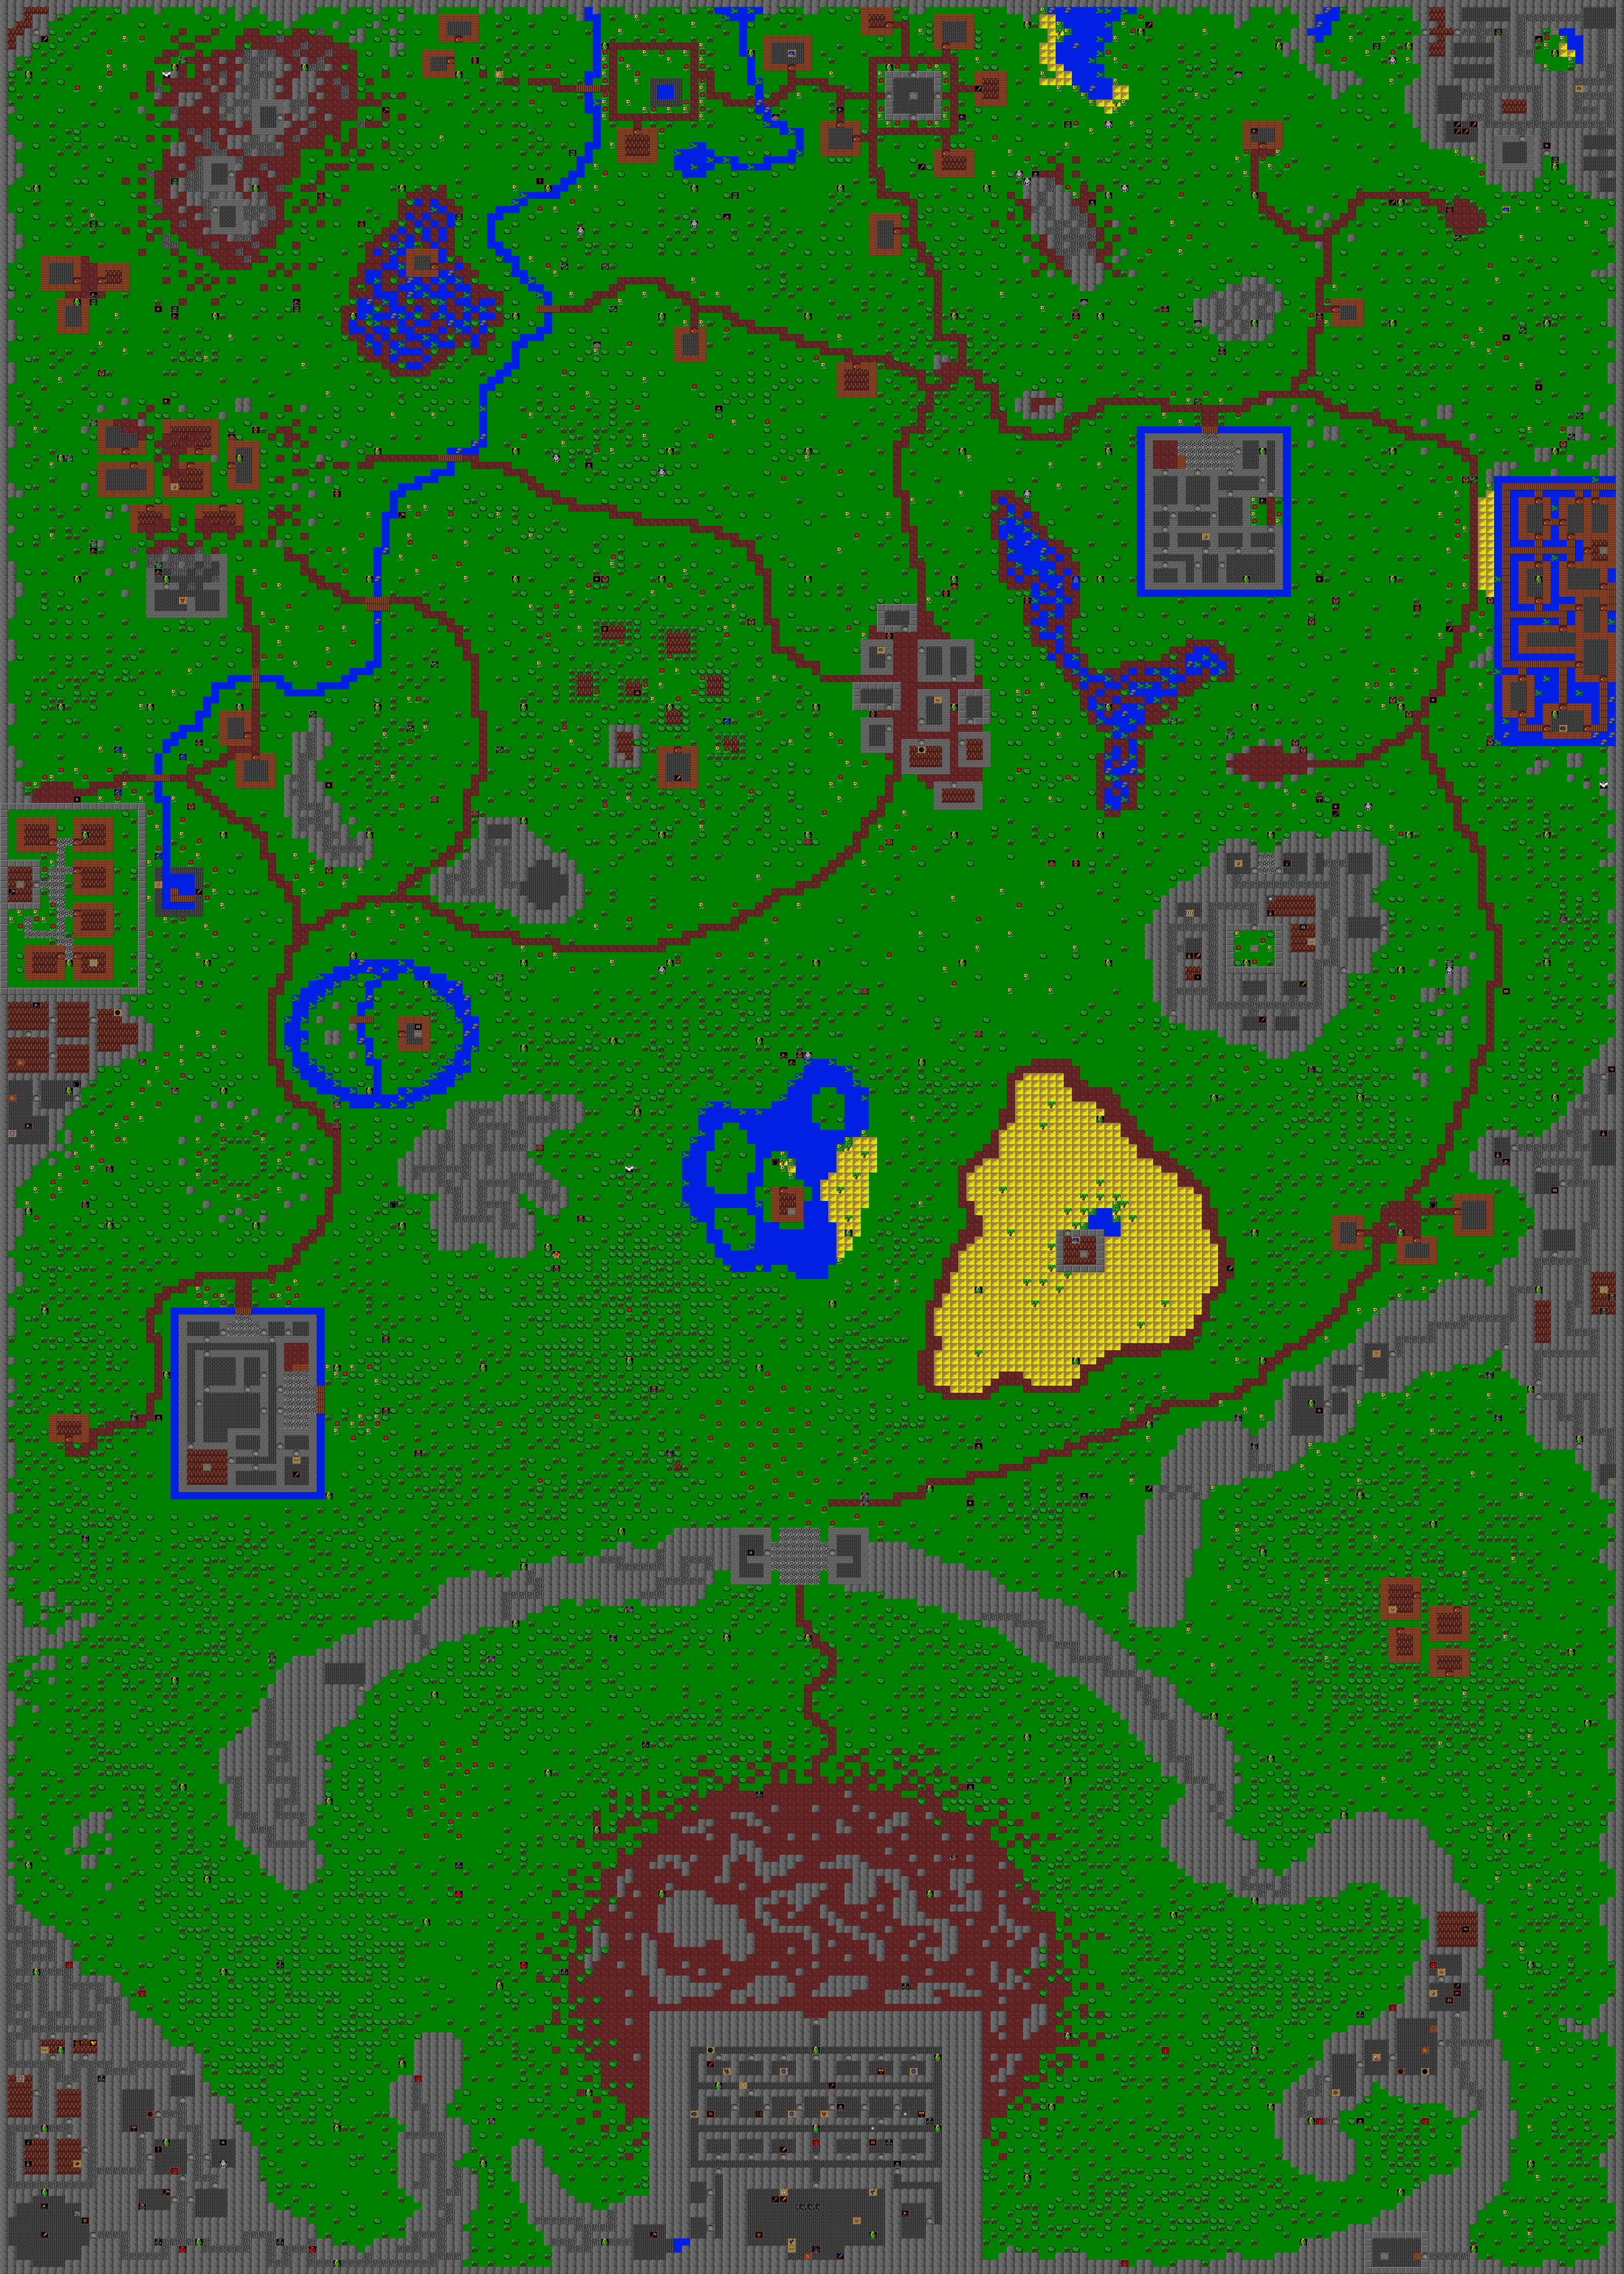
My love of game maps drove me to hand-draw this map of the obscure DOS roguelike Magus recently. From https://mastodon.gamedev.place/@congusbongus/111900901099931635
🇯🇵
There are two good reasons why almost all travel itineraries for first-time visits to Japan will involve Tokyo and Osaka: they are very well served by high speed rail, and both are large cities with lots of things to see and do. While starting a tour in Tokyo makes sense, there are many good travel locations much closer to Tokyo - in Greater Tokyo or not far out - that often get neglected. This discrepancy becomes apparent when you start looking at a map of Japan. Of course, the reason is obvious when you consider transit, and the personal experience of actually doing the travelling, but the map won’t make this apparent at all.
Read more
With few exceptions, first-time Japan travel itineraries will include the Tokyo-Osaka rail corridor, occasionally including day trips from either city. Destinations outside these areas sadly get neglected. From: https://www.voyagedmagazine.com/how-to-plan-your-first-trip-to-japan-travel-guide-itinerary/


